Harvesting honey is an active time in the life of a beekeeper. To quickly cope with the work, it is desirable to have equipment to increase the speed of printing frames. In the article you will find information on how to create a table for cutting honeycombs with your own hands.
Why a beekeeper needs a table for listing honeycombs
A table for printing honeycombs speeds up and facilitates the process of pumping honey. Initially, the cells are covered with wax. To open them, you need to cut off the lids or puncture the cells with a special device before placing them in the honey extractor. At its core, a table is a holder for frames at the moment when the beekeeper opens them.
Did you know? The most expensive honey in the world is collected by Himalayan bees from flowering rhododendrons. Its cost is affected by the complexity of the collection, as well as the fact that it has hallucinogenic properties.
The design of the tables is often different in size, and each beekeeper tries to choose a device for directly opening the cells in accordance with his capabilities and needs.
The classic version of the table is a wooden frame with 2 bars mounted on top. Honeycombs are hung on them. Below them is a grid on which caps will fall (zabrus). The bottom of the structure should be inclined. This provides a flow of honey. Through the hole in the lower part of the structure, it will drain into the honey collection container.

Types of apiary tables and fixtures
The complexity of printing honeycombs is the viscosity of the material. Cutting lids without special tools is difficult, so beekeepers seek to facilitate the process. Ways to open the lids: cutting, cutting honeycombs or piercing the cells with a special tool.
Important! In the process of preparing for work, beekeepers warm their honeycombs. Heating temperature should not be higher than +40°C, so as not to change the useful properties of the product.
Main devices:
- Knives of a special shape. May be ordinary or electrical. Regardless of the type, the knife must be heated before work in order to increase the fluidity of the wax.

- Forks. Used to pierce the cells. They are made of steel and are the simplest printing equipment.
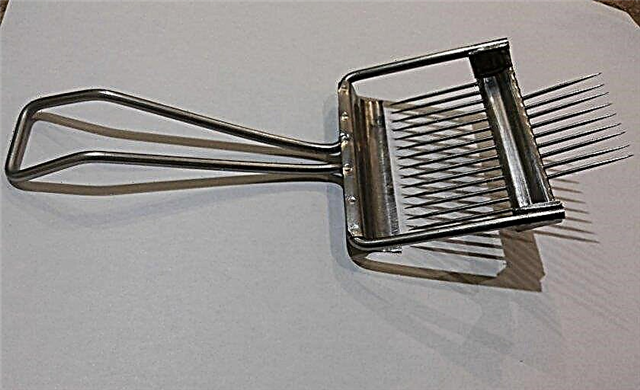
- Rink. It may look like a fork. The main part of the design is a rotating drum with needles. Rollers are available in different sizes with metal or plastic needles.

- Special tables. In their upper part there should be a device for attaching frames, a net for collecting timber is installed under it, and honey removed from them should drain into the tank. You can make a table yourself, using improvised materials.
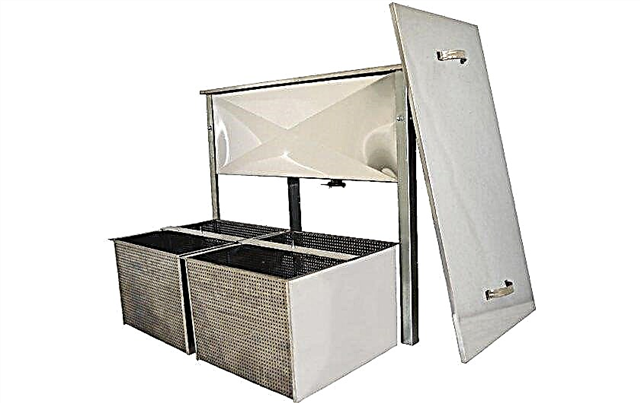
- Industrial machine tools. The principle of operation is the same as that of tables. The difference is that the cut is cut off on both sides. The productivity of machines is much higher than that of tables, since machine processing takes significantly less time per 1 frame.

How to make a DIY machine for printing honeycombs
The simplest table can be made using a tank from an old washing machine or another similar container. For manufacturing, you will also need a stainless steel mesh, trims and self-tapping screws.
Drawings and Dimensions
Schematically, the design will look as follows:
- The frame on which the entire structure is mounted is made of wood or metal. It looks like a table in shape.
- A tank is installed on the frame. There should be a honey drain in the bottom of the tank. If this is a tank from the washing machine, then such a hole already exists in it.
- At the bottom of the hole, a choke valve is installed to regulate the drain of honey. Better if it is a ball valve. Use a threaded adapter to connect it to the nozzle.
- A mesh should be installed inside, on which the fall will fall. The diameter of the cells is 3 mm. The grid can also be mounted in the upper part of the structure on a special frame made of slats.
- A frame stand is mounted above the tank. It is convenient if it is removable.
Table for printing honeycombs with a tank from the washing machine:
Tools and materials
For work you will need:
- saw with disks for wood and metal;
- drill;
- hammer;
- screwdriver.
It will be great if you take a ready-made design for the frame. If this is not the case, then you will need a metal pipe or rails and a welding machine to create a frame. You can also make a wooden frame. To create the rest of the structure, the following materials will be required: tank, mesh, screws, wooden planks.
Assembly process
The assembly consists in manufacturing the frame and placing the rest of the structure on it. The height of the table should be about 70–90 cm. Focus on the fact that the beekeeper should be comfortable during work. Width - about 70 cm (depends on the width of the frames and the size of your tank).
Important! Bees collect honey from any flowers, including poisonous ones, so do not install the apiary in places with unknown honey plants.
The assembly process itself step by step looks like this:
- If possible, make handles for the tank so that after work it can be conveniently removed and washed.
- Install the tank on the frame.
- Fasten the net inside the tank.
- At the top, assemble the holder for the frames. It can be made of plywood or small wooden blocks.
Video: table for printing honey frames
Tips from experienced beekeepers
Keep in mind that the table is a device for holding frames, so the size of the structure should be just convenient for the work of someone who will be engaged in pumping honey.
The technology of the working process, according to experienced beekeepers, is quite simple and takes place in several stages:
- At the bottom of the set capacity for collecting honey.
- The frame is heated before work.
- Install the frame in the holder.
- With a knife, fork or skating rink, they remove the zabrus. Fallen lids will remain on the grid, and honey will drain into the container.
- After finishing work, the structure must be washed thoroughly.
A table for printing honeycombs should be simple, convenient, easy to move and maintain. It is also advisable to make it collapsible, so that it is convenient to store.


